Pages

Monday, April 30, 2018

MFT Bold Blossoms

Happy Monday! Last day of April and I am hoping it really brings May flowers! I am in love with the MFT Bold Blossoms stamp set from their last release.


I die cut a Neena Solar White 80lbs panel with my Wonky Stitched Rectangle die to use as my base panel and pulled out my Catherine Pooler Inks.  The quality of these inks made this card so easy and it took about 25 minutes.  I stamped my flowers and I overlapped them, didn't bother to mask anything.  


I wanted rainbow order (or as much as possible) so I started with the largest bloom and just went in a circular motion until I had the right coverage for the large MFT Hugs die. Once that was complete, I die cut the Hugs into the panel and I also die cut some black fun foam to give the sentiment dimension and a hint of shadow.


I white heat embossed the sending you sentiment from an older MFT set on black card stock and glued it to my "hugs". I finished the project by adding some Pretty Pink Posh Sparkling Clear sequins.

Thanks for taking the time and have a great day!
Kim

Friday, April 27, 2018

April Showers Bring May Flowers!

Happy Friday! Time for a fun new challenge over at the CAS-ual Friday's Challenge Blog :) This week we are all about flowers!


I was inspired to use the Truth Is stamp set once more because it is my all-time fav. CAS-ual Friday's Stamp set.  Only I decided to play with ink smooshing this time.  I started by stamping my flowers and sentiment with Versafine Onyx Black Ink (in hindsight I should have waited and stamped them after I was done with my Oxide smooshing because the Oxides dull the black ink).  

On a piece of Bristol Smooth card stock, I used Picked Raspberry, Abandoned Coral and Squeezed Lemonade Oxide and a little of the Picked Raspberry Distress Ink only to intensify the pink (all applied with my stamp set backer acetate).  

I then added color to my flowers with my Zig Clean Color Brush Markers in coordinating colors. I then went over all of the black stamping with one of my 0.5 black markers to remove the filmy overlay that the Oxides left. I used my 1/2 inch corner chomper on two of the opposing corners. Added my panel to my Avery Elle grey card base.

I then added my Studio Katia Iridescent Bubbles and some Nuvo Black and White Crystal drops.


Join us at the CAS-ual Fridays Challenge blog for the chance to win $25 worth of CAS-ual Fridays Stamps and, drum roll please... Michelle with double the prize if you use CAS-ual Fridays stamps!


Thanks so much for taking the time!
Kim

Tuesday, April 24, 2018

Spring Layering Flowers!

Happy Tuesday! Kim with you today sharing a spring inspired card with some of the fantastic Hero Arts Layering Flowers :)


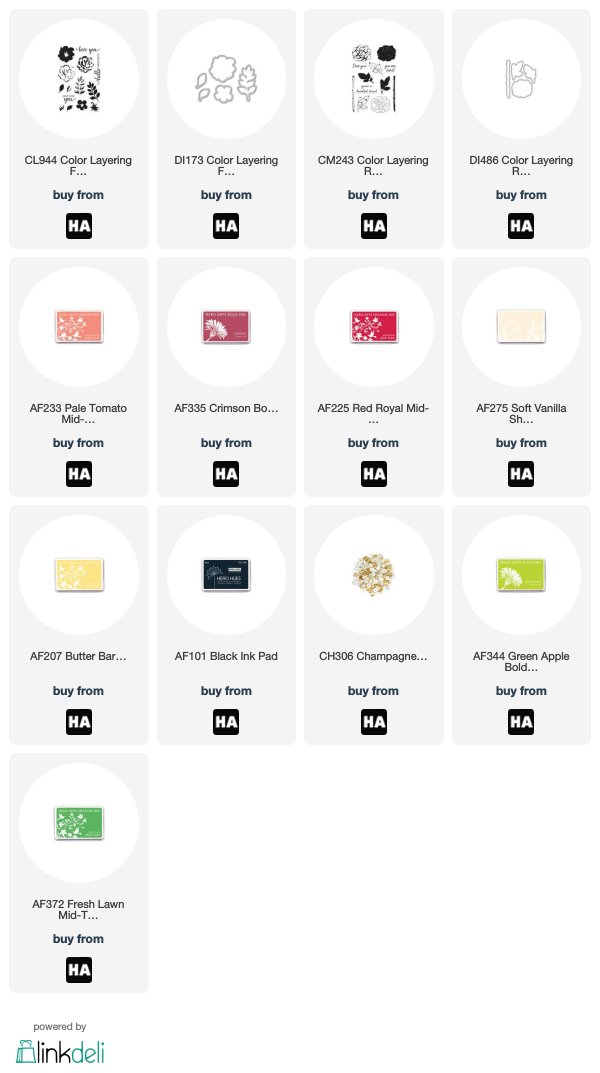
I decided to go with a color scheme that I rarely use but always like the end result! I started by stamping my flowers and leaves from the For You Flowers and Layering Roses using Hero Arts inks in Pale Tomato, Crimson, Red Royal, Soft Vanilla, Butter Bar, Green Apple and Fresh Lawn and die cut my images with the accompanying dies.


I love using wood grain pattern paper with this color scheme so I pulled a small piece out of my stash to go behind the window. Once that was complete I place my panel on top of the pattern paper and adhered everything to the card base.


Once I lined up my flowers and was happy with the placement, I took a picture (makes it easier to place after stamping the sentiment). I stamped my sentiment also from the For You Flowers in Hero Arts Black Die Ink. Place my flowers with a mix of foam tape and glue. I finished by placing a few sequins and felt I needed a little something extra so I added a small strip of black and white stripe paper from my stash. These layering flowers really make it possible to create a fun and quick project! All the supplies are listed below!

Go check out the challenge! Have a great day and thanks for taking the time!
Kim

Monday, April 23, 2018

Rainbow Turtle!

Happy Monday crafty friends! Spring has sprung - at least it finally has in Montreal! I decided to play with these sweet new MFT products for a fun rainbow project!


I used the Too Cute Turtles and A Tweet Hello for this project.  That turtle is too sweet! I stamped my images on Neena Solar White - 80lbs paper to use my Copic markers. Aside from the rainbow turtle, I also colored the butterflies in rainbow order. Once that was finished I used the accompanying die cuts.


I finally got my hands on the Pretty Pink Posh Peek-a-Boo die and I had to use it to feature the turtle. I die cut the white panel and I die cut the back of the pattern paper that I wanted to appear when the die was cut open.  I also die cut the pattern part with a circle die just to be able to glue it to the back of the panel with more ease. Before I opened and glued the Peek-A-Boo die I embossed the main panel with the We R' Memory Keepers 3D polka dot folder. I then cut open the Peek-a-Boo and placed the pattern paper on the back.


I placed my turtle and then adhered the panel to the base card with foam tape.  I then placed my other images along with my MFT Hooray die and the accompanying sentiment from the Too Cute Turtles :) To finish I added some Studio Katia Iridescent Bubbles!

Thanks for taking the time!
Kim

Friday, April 20, 2018

Michele's 50th Birthday Bash!

Happy Friday crafty friends! Today, I am super excited to be hopping along for Michele's 50th Birthday Bash! Michele is the owner of CAS-ual Friday's Stamps and we are blog hopping to celebrate 50!

You have the chance of winning one of 5 $50 dollar gift cards! One winner will be chosen from the CAS-ual Friday's company blog and four others will be chosen randomly from comments on the various blog hop posts. Good luck and enjoy the hop!

The entire list of blog links can be found on the CAS-ual Friday's blog. You will have arrived here from the super talented Virginia Lu's blog.


My project features some of my favorite CAS-ual Friday's products! I knew I absolutely wanted to use my Truth Is stamp set these flowers make my heart flutter! And I figured what's better than a rainbow to bring in a big birthday!


I started by stamping my blooms with Catherine Pooler's Lime Rickey Ink (all of the inks used on this project are by Catherine Pooler) on the side of the panel so that I could accommodate the Birthday from the Shenanigans stamp set.  I then stamped my sentiments, I used CP Midnight for the happy and the sentiment on the bottom of the panel and a mix of the CP pastel collection for the birthday. These inks stamp so smoothly that it was easy to create a rainbow with the birthday sentiment.  


I then stamped and gold embossed a series of the blooms on a separate piece of Neena 80 lbs card stock so that I could color with my Copics in rainbow colors.  I then used the Truth Bloom die and die cut all of my flowers. I used foam tape to give some dimension on all the blooms and cut the excess on the sides. I topped off the project with a mix of Lucie's Little Things Rainbow gems and some black Nuvo Crystal Drops for the flower centres. 

Your next stop on the hop is the super talented Michelle Wallace. Don't forget to leave a comment for the chance to win! Enjoy :) Happy Birthday Michele!


Thanks for taking the time!
Kim


Tuesday, April 17, 2018

Spring Rain

Happy Tuesday! We are getting over a fun April freezing rain storm (insert sarcasm here)!  Lots of rain this week but warmer temps which means Spring has sprung! So I was inspired for the current Simon Says Stamp Anything Goes Flickr Challenge!


I recently placed an order for some Simon's brand exclusives and I had to add the sweet Showers and Flowers set! The first thing I inked up were these sweet polka dot wellies! I colored everything with Copics (shocker, my go to coloring medium). I fussy cut the image because I did't realize there were accompanying dies... they are going in my next shopping basket! lol


I then decided to use the new Reverse Polka 6 x 6 cling background stamp (love it) with some SSS Fog ink on some Neena 80lbs card stock.  I love this background stamp, I have always loved polka dots!  I die cut the panel with an MFT die - upper centre and placed the panel to my card base with 3M foam tape.


I placed the image in the circle and added the great "kindness" sentiment from the same set. To top off my project, I used to Pretty Pink Posh Thank You Script die with Tonic Black Glitter card stock. I added some Tonic glitter pen and Tonic glue to the main image.

Thanks for taking the time!
Kim


Sunday, April 15, 2018

A Blog Named Hero - Put A Flower On It

Happy Sunday crafty friends! Time for a new challenge at A Blog Named hero! This month we are putting a flower on it!


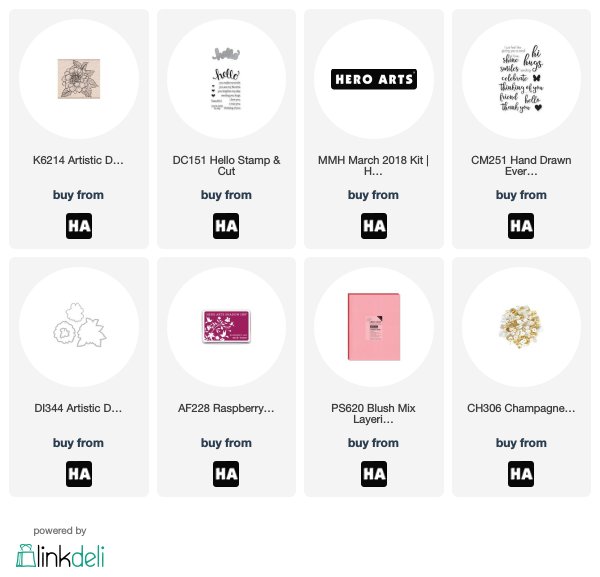
Hero Arts flowers are simply beautiful in design and with their lines, I opted for the Artistic Dahlia for this challenge.  I have always loved woodblock stamps and the Hero Arts flowers are such fun to work with. I stamped the Dahlia on Neena 80 lbs card stock so that I could Copic color.  I had originally wanted coral and pink but I kept adding darker colors in the same color families to add depth. I then used my favourite green combination Y21, Y23 and Y17 for the leaves.


I then used the accompanying die for the Dahlia and decided to pair the bold flower with Kraft card stock which I cut to 4 x 5.25. I die cut my Hugs die (from the March 2018 card kit which is still available in limited quantities) in gold mirror card stock and fun foam. Once I placed my sentiment and flower on the base panel I decided to add some hearts (Hello Script Stamp and Cut) with Raspberry Jam die ink.


The sending sentiment is from the Hand Drawn Every Day Greetings also stamped with Raspberry Jam ink on the same Kraft paper. Once that was complete, I added some gold sequins along the diagonal of the panel and glossy accents on the hearts.


Thanks so much for taking the time, go check out the challenge!
Kim

Friday, April 13, 2018

CAS-ual Fridays - Forget your Trebles!

Happy Friday crafty friends! That means it's time for a new CAS-ual Fridays Challenge! The challenge is all about forgetting your trebles!


What's better than a rainbow to forget your trebles, lol.  I started with the CAS-ual Fridays Heart Note Fri-die and die cut it from several colors of card stock. I decided to die cut a border from my top panel with a fun angle so that I could add some rainbow paper in the same tones as the Heart Note in the back. This was a fun and simple card to put together.


Once I placed my Neena 80lbs top panel I lined up my notes and glued them to the white card stock. I then die cut the Smiling Fri-Die and a StickIt and Fun Foam sandwich along with a back piece of card stock and placed it on top of the notes.  I added Nuvo Crystal Glaze and once it was dry added some white gel pen for highlights. To top off my project, I added some of the new Studio Katia Iridescent Bubble to pick up the rainbow colors.


Join us at the CAS-ual Fridays Challenge blog for the chance to win $25 worth of CAS-ual Fridays Stamps and, drum roll please... Michelle with double the prize if you use CAS-ual Fridays stamps!


Thanks so much for taking the time!
Kim

Wednesday, April 11, 2018

Toad-ally Awesome Friend

Happy Hump Day! Gorgeous sunny day today in Montreal, spring is finally starting to make an appearance! Today I am sharing this Toad-Ally Awesome My Favorite Things project :)


The new Toad-ally Awesome stamp set is such fun! I picked it up last week and had to play with it right away.  I started by coloring my toad with some G2 Copic family of markers and added some dot detail with my darkest G29 and some white Gellyroll pen.  He was such fun to color! I then used the coordinating die for the toad.


I wanted a fun little scene for the toad to be the star of the show so cut my Neena 80 lbs card base to 4 x 5.25 and used the MFT Stencil Cloud with Shaded Lilac Distress Oxide Ink. I then opted for the MFT End of the Rainbow Die-Namics die set. I die cut the rainbow die from multiple MFT and Lawn Fawn card stocks


I glued the rainbow to the card base and die cut the accompanying cloud die as well as the stand alone stitched cloud dies (also by MFT) from another panel of Neena 80lbs. I glued them to the base and placed my toad with some foam tape for added dimension (I regretted not using an action wobbler for the toad, I may still change that).


Once my scene was complete, I felt I needed a bigger sentiment so I stamped and embossed a portion of the sentiment on black card stock and the end of the sentiment (friend) on the bottom of the cloud. I substituted the awesome on the stamped sentiment with he Neat and Tangled Awesome die.

Once I was happy with my placement, I added some Pretty Pink Posh Jewels and some Studio Katia Iridescent Bubbles and the eyelash googly eyes on the toad (really makes it look like he is staring at you, lol!)

Thanks for taking the time!
Kim

Monday, April 9, 2018

Art Impressions - Hamster!

Happy Monday crafty friends! I watched a video by Sandy Allnock a few weeks ago featuring this sweet Art Impressions Hamster Mouthful Set and I couldn't resist ordering him!


Again, I am in love with critters of all kinds! My husband keeps saying we need to by a ranch so that I can adopt all the littles that my heart desires lol! So when I saw this set I needed to have it.  I love that is has a die cut for the hamsters hands to add all the fun elements that come with the set. You can have him eating pizza or holding a flower, cheese a letter or these birthday candles that I chose for my project.


This little dude had to be the focal point for my card so I kept everything else simple. I stamped him in Lawn Fawn Jet Black ink and colored him with Copics in the E41 - E47 family and added dot detail with the darkest of the colors. I then rainbow colored his hat and candles and used the accompanying dies.


For the sentiment, I used Distress Oxides and went over the Happy with rainbow colors. I then added one of the Mama Elephant occasional labels underneath. I then added some Pretty Pink Posh Jewels to finish off the project!

Thanks for taking the time!
Kim

Friday, April 6, 2018

Pretty Pink Posh Wild Roses

Happy Friday crafty friends! So happy the weekend is a couple of hours away! My local store has started carrying Pretty Pink Posh and I couldn't resist playing with this Wild Rose set!

I goggled wild roses and my inspiration picture is a little further down in this post, I wanted something a little different and bright!


I didn't have a specific vision for this card, I just loved the colors from the wild rose picture I found on google. So I pulled out my RV00, RV02, RV04 and Y00,Y11 and Y15 to mimic the colors below.


Once I finished the flowers I colored my leaves in YG21, YG25 and YG17 and die cut all of the images. I decided that a stark black and white background would be best for the bright flowers.


I cut a piece of Lawn Fawn black card stock to A2 size and then decided to use my Avery Elle Horizontal Stripes die with Neena 80lbs card stock. I really like the way the flowers look against that background. I then used some Tonic glitter paper and fun foam with StickIt sandwich to die cut the Pretty Pink Posh Thank You Script sentiment. The pink glitter works so well with the flowers.

I debated adding in the white circle back to the centre of the frame but felt leaving the middle black was fine. I am still on the fence, lol.


I put all of my elements together and topped everything off with the new Pretty Pink Posh Watermelon Jewels (I love all the jewel colors in this line!)

Thanks so much for taking the time!
Kim

Wednesday, April 4, 2018

Spring flowers with Hello Bluebird stamps!

Happy hump day crafty friends! I woke up this morning to a snowfall and I felt like crying, lol. So I am sharing spring inspired flowers today :)


I ordered a series of Hello Bluebird stamps from Butterfly Reflections Ink. It's a new company and I have to say the whimsical critters and fun designs from this company have my heart going pitter patter. I decided to help jump start spring (at least physiologically) and use these beautiful flowers from the Send Flowers set. 


I decided to make my own background and used the beautiful Catherine Pooler Inks in It's a Girl, Party Dress, Peach Bellini, Polished, Tiara, Sweet Sixteen, Pixie Dust, Mint to be, All that Jazz, Melon Ice and Lime Rickey. I love these inks so much, there is no need to use a stamp positioner because I never need to double stamp!

Once all my flowers were stamped I went in with the small dot from the same stamp set and added a few in Midnight black. I then stamped the Hello Friend sentiment from the same set and an additional sentiment from the Spring Script set that actually says I Miss Your but I masked the "r". I then added some of the beautiful new Studio Katia Iridescent bubbles.


Many of my dearest friends live at a distance so I can never have enough of these types of cards. But this one is going in the mail this week to help cheer someone up that may have the late winter blues!

Thanks for taking the time!
Kim


Monday, April 2, 2018

Altenew Washi

Happy Monday! I hope you had an Easter weekend filled with family and friends! I love the Easter long-weekend four days to re-charge and re-connect. Also, lots of time set aside in my craft room! 

I picked-up the new Altenew washi tapes last week and let me tell you they have my little heart! We celebrated one of my cousin's birthdays over the weekend and I had to use one of the washi's on it.


The starting point was obviously the washi, and I love that this role has color options. I didn't get further than the blue and pink option, not sure if there are more but such a great idea. I knew I wanted  the tape on the bottom, so I took my card base and placed the washi. 


I then stamped my Altenew Painted flowers (probably my favourite set by them) in some Catherine Pooler inks, It's a Boy and Something Borrowed to match the blue on the tape. I die cut the flowers and took another piece of Neena Solar White 80lbs, sized the frame and used a Lawn Fawn Stitched Border die.


I am thrilled that more companies are releasing great French sentiment die cuts (my entire family is French-speaking) I die cut the Bonne Fete from a StickIt, Fun foam and gold card stock sandwich. I placed my flowers around the sentiment to make sure I liked the placement and then glued everything down. I finished off with some new Studio Katia iridescent sequins and some Nuvo Glitter pen on the flowers.

Thanks so much for taking the time!
Kim